DIY Baby Bunny Nursery Card with Printable Scrapbook Paper
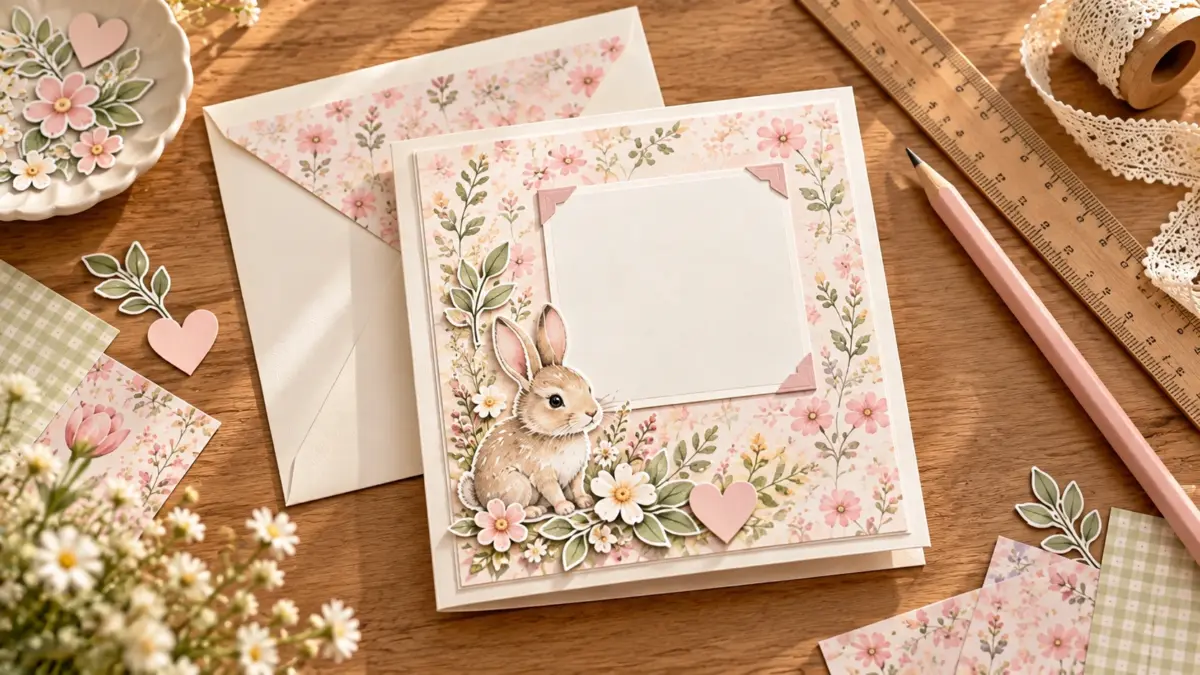
Make a baby bunny nursery card with a folded blank base, a small panel of printable scrapbook paper and one focal illustration or shape. Keep the message area clear so the design feels personal and the words are easy to read. This project uses common craft supplies; any printable paper or bunny artwork is optional and should be checked for its actual size and use terms before you print or include it.
The steps below describe a handmade card, not a specific ScrapBujo product. You can use patterned paper you already own, draw a bunny yourself, use a licensed illustration or keep the front purely geometric. The simple layout is easy to adapt for a baby shower, nursery welcome or new-parent note.
Gather the materials
You will need a blank card base or sturdy paper to fold, a ruler, pencil, scissors or paper trimmer, adhesive, and one decorative paper or illustration. A bone folder can help make a neat crease, but the back of a spoon also works when used carefully. A pen for the inside message completes the basic set.
If printing a decorative panel, confirm its page dimensions and the terms that apply to the file. Check that your printer supports the paper you plan to use. Begin with a test on plain paper. For the card base, use a weight that folds cleanly and fits your envelope. If you do not have a pre-made card blank, measure the envelope first; finished cards need to fit without bending the corners.
Pick a simple card layout
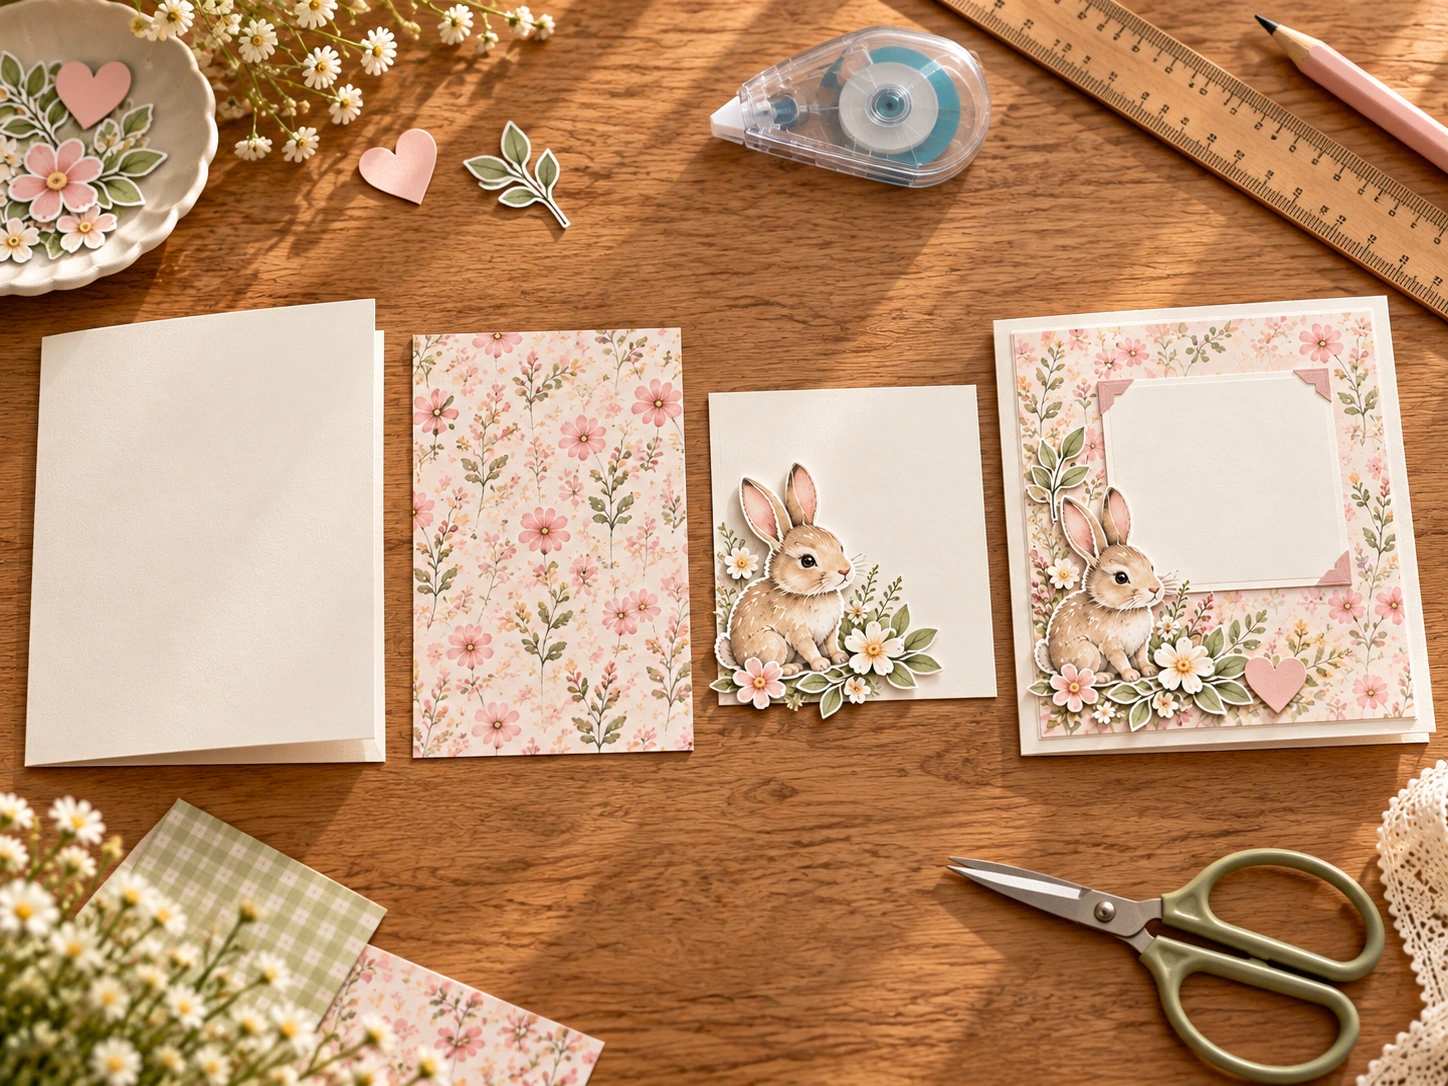
Choose one focal area on the front. For example, place a patterned rectangle across the lower third, then layer a smaller plain square with a bunny drawing or cutout above it. Another option is a narrow printed strip along one side and a small moon or flower shape near the top. Keep the main illustration away from the fold and leave a blank space for a title or short greeting.
Limit the front to a few shapes. A single patterned panel and focal image are enough to suggest a nursery theme. If the paper is already busy, use a plain mat behind the bunny. If the illustration is delicate, give it a quiet background. Hold the pieces in place without adhesive and check the balance from a short distance.
Cut and assemble the card
- Measure the envelope. Choose a finished card size that slides inside with a little clearance.
- Cut the base. Cut a rectangle twice the finished card height or width, depending on the fold direction.
- Score and fold. Mark the center lightly, score along a ruler if available, and fold carefully. A sharp crease helps the card close flat.
- Make a paper panel. Cut a piece smaller than the front, leaving a narrow border of the base visible.
- Add the focal layer. Center the bunny illustration or shape on a plain mat. Check that no important detail will be hidden by the fold.
- Test the layout. Place all pieces on the card and close it once to ensure nothing catches or overlaps awkwardly.
- Attach the layers. Use a small amount of adhesive, following its package directions. Press the panel evenly and let it dry flat.
If you printed the paper, make sure it is fully dry before applying adhesive. Some inkjet prints need time before handling. Test the adhesive on scraps because some glues can wrinkle light paper or show through thin designs. Double-sided tape can be useful for a flat panel, while small glue dots can attach a lightweight focal layer.
Add a message that fits the occasion
Write a brief welcome, congratulations or a personal note inside. You can add the baby’s name if it is known and you are comfortable including it. If you are not sure how the family wants the name spelled or what they prefer to share, keep the greeting general. A handwritten message does not need to be long; a specific kind sentence is often enough.
For a shower card, you might leave room for a short wish or a note for the parents. For a nursery card, a simple greeting and date can make it a keepsake. Avoid writing on top of a glossy or coated surface unless you have tested the pen, and check for smearing before closing the card.
Make variations without buying more supplies
Use scraps from the panel as a narrow inside border, bookmark or small tag. Change the focal shape for a moon, star, flower or initial. If you do not have printed paper, color a blank panel with pencils or markers, or use a plain layer and draw a simple border. The layout works with many colors; it does not depend on a specific gender palette.
For a coordinated set, keep the base size and focal placement consistent while changing the message or accent color. Make one card first, then use it as a reference. Do not batch cut all the pieces until you know the first version fits its envelope and folds properly.
Troubleshooting
- The card will not close flat: reduce the thickness of the layers and keep bulk away from the fold.
- The panel is crooked: mark a light centerline or use a paper guide before attaching it.
- The print is cropped: check paper size and scaling, then test again on plain paper.
- The ink smears: allow more drying time and test the paper surface and pen separately.
- The envelope is too small: trim the card edges or use a larger envelope before adding more decoration.
FAQs
What paper should I use for a handmade baby card?
Use a base that folds cleanly and fits the envelope. For printed accents, follow your printer’s supported paper specifications and test a sheet.
Can I print scrapbook paper for only one card?
Yes. Print only what you need if your file and license allow that use. Check the specific download terms and keep the original file unchanged.
How do I keep the printed border from being cut off?
Match the file size to the paper, inspect the print preview and use a test sheet. Many home printers leave a nonprintable edge.
What if I do not have a bunny illustration?
Draw a simple bunny silhouette, cut one from plain paper or use a different focal shape. The project is a layout idea, not dependent on a supplied graphic.
How long should the card message be?
A few thoughtful sentences are enough. Leave room for the family to keep the card with other notes or photographs.
Can I make the card gender-neutral?
Yes. Choose colors and shapes that suit the family or use a neutral base. The bunny motif and layout do not require a particular palette.
Related links
For optional paper accents, check the current files and terms on the Baby Bunny US Letter sample page or Baby Bunny A4 sample page. If your border is clipped, read Borderless Printing or Actual Size?.
Image note: the card-making scenes in this guide are illustrative AI-generated mockups created with ImageGen using the approved ScrapBujo baby scrapbook style as a visual reference. They demonstrate one possible assembly and finished result; they are not photographs of a purchased kit or proof that the pictured pieces are included in a download.
Explore ScrapBujo digital collections
Digital paper collections for your next project
Explore coordinated digital collections on ScrapBujo, compare formats, and follow the checkout shown for the product you choose.
12×12 in 300 DPI Digital download
Digital Scrapbook Papers
November Harvest Gratitude Digital
Explore 20 coordinated digital scrapbook papers from the ScrapBujo November Harvest Gratitude Digital…
300 DPI Digital download
Digital Scrapbook Papers
Ratoncito Perez Tooth Fairy
Explore 111 US Letter JPG scrapbook papers and 20 transparent PNG cliparts from…

12×12 in 300 DPI Digital download
Digital Scrapbook Papers
Equestrian Horse Barn Life Scrapbook
Explore 50 coordinated digital scrapbook papers from the ScrapBujo Equestrian Horse Barn Life…
Each product page identifies its checkout, current price, and digital delivery details.